
How to Order a Custom Frame Bag from Stealth
A frame bag is one of the best things you can add to your bike. Whether you're bikepacking, touring, commuting or just heading out for a day ride, having storage right in the middle of your frame makes everything easier. The weight sits low and central, it's out of the way, and you can fit way more in there than you'd think.

The catch? Every bike frame is different. That's why I make custom frame bags — built to fit your specific bike perfectly.
I've been making frame bags for 11 years now, and in that time I've built bags for just about every type of bike you can think of. Road bikes, gravel bikes, touring bikes, tandems, hardtails, and — this surprises people — a lot of full suspension mountain bikes. More on that below.
Here's how the whole process works, from start to finish.
First Decision: Full Frame or Half Frame?
Before we get into templates and fabrics, you need to decide whether you want a full frame bag or a half frame bag.
Full Frame Bags
A full frame bag fills the entire triangle between your top tube, down tube, and seat tube. These work best for:
- Smaller frames where you're not giving up much bottle space
- Bikepacking where you need maximum storage
- Full suspension mountain bikes where bottle cages don't fit well anyway (and yes, custom bags work great on full sus — see below)
- Anyone who doesn't need bottles in the main triangle (you can always run bottles on your fork or down tube)
Full frame bags can range anywhere from 3-6 litres depending on your frame size. That's a lot of space for tools, food, a jacket, and all the bits that make a ride more comfortable.

Half Frame Bags
A half frame bag sits in the upper portion of the triangle, leaving room for bottle cages underneath. These are better for:
- Larger frames (56cm+) where a full bag would be massive
- Road and gravel bikes where you want easy access to bottles
- Day rides and shorter tours where you don't need huge capacity
- Hot days where water access is more important than storage
Half frame bags typically give you 1.5-3 litres — still plenty for the essentials without taking over your whole frame.

What About Full Suspension Bikes?
Here's something a lot of people don't realise: you absolutely can have a frame bag on a full suspension bike. At least 25% of the frame bags I make are for full suspension bikes, and they work brilliantly.
The key is working around the shock and linkage rather than pretending they're not there. With a custom bag, I can design it to fit in the available space — whether that's a narrow bag that sits alongside the shock, a shaped bag that wraps around linkages, or a bag that uses the space above or below the shock.
If you've got a full suspension bike and you're not sure if a frame bag will fit, just send me a photo or bring the bike to the workshop. I've done enough of these now that I can usually tell straight away what'll work.
The bonus with full suspension bikes? You often can't run bottle cages in the main triangle anyway, so you're not giving up bottle space — you're gaining storage you wouldn't otherwise have.

Getting Me a Template
Since every frame is different, I need a template to build your bag. There are three ways to do this:
Option 1: Paper Template (Most Accurate)
This is the old-school method and it's still the most reliable. You'll need:
- Cardboard or paper big enough to cover your frame triangle
- Scissors
- A felt-tip pen
- Tape (optional but helpful)
The process:
1. Remove any bottle cages or other bits that'll get in the way
2. Hold the paper up to the inside of your frame (tape helps here)
3. Trace around the inside of the frame with your pen
4. Mark any cable stops, bottle bosses, or obstacles (like a front derailleur)
5. Cut the template out (cut slightly outside your line — easier to take more off than put it back on)
6. Test-fit it in the frame to make sure it's snug
7. Write your bike make, model, year, and size on the template
8. Add your contact details and what you want (colour, zips, extras)
9. Post it to me
My address:
Stealth Adventure Equipment
83/12 Mohuia Crescent
Porirua 5022
New Zealand
Download the paper template instructions here

Option 2: Photo Template (Easier, Requires Precision)
If you've got a good camera or phone, you can send me a photo instead. This takes a bit of persistence to get right, but it saves you posting anything.
What you'll need:
- A tape measure or ruler
- Good lighting (outside, out of direct sunlight)
- A contrasting background so I can see the frame edges clearly
- Patience
The process:
1. Prepare your frame (remove bottle cages but ensure bolts are put back in for full frame bags, leave them in for half frame bags)
2. Tape a ruler or measuring tape to the frame — make sure it's straight and doesn't block the view of the inside
3. Set the bike up against a contrasting background, as close to vertical as possible
4. Walk at least 3 metres back from the bike (this is crucial — any closer and the perspective gets distorted)
5. Crouch down so your camera is level with the centre of the frame
6. Take one high-resolution photo
7. Zoom in and check that you can clearly see the 1cm markings on the tape
8. Email it to me with your bike make, model, size, and year
The key here is distance. If you're closer than 3m, the perspective warps and the template won't be accurate. I know it's frustrating trying to see those ruler markings from that far away, but it's worth getting it right.
Download the photo template instructions here

Option 3: Visit the Workshop (Wellington Only)
If you're in Wellington, just bring your bike to the workshop and I'll measure it up on the spot. Easy.
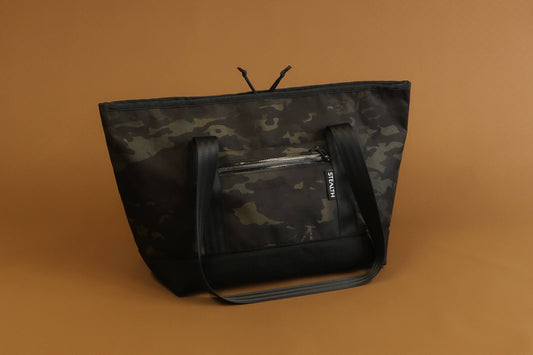
Choosing Your Zip Configuration
Once I've got your template sorted, you'll need to decide on zips.
Single Zip
One large compartment, accessed from the top. Simple, clean, easy to pack.
Best for:
- Smaller full frame bags
- Half frame bags (single zip only)
- People who like simplicity

Double Zip
Two compartments separated by a Velcro divider, accessed via two zips (one top, one bottom).
Best for:
- Larger full frame bags (56cm+ frames)
- Keeping gear organised (tools in one side, food in the other)
- Preventing the bag from bulging when fully packed
The double zip adds a bit of weight and cost, but it makes packing and accessing stuff way easier on bigger bags.

Map/Phone Pocket (Optional Extra)
This is a slim pocket between the exterior fabric and the liner fabric, accessed via a zip from the top. Brilliant for keeping your phone, maps, or snacks separate from everything else in the bag.
For full frame bags with a double zip, this pocket sits where the Velcro divider is — so it's half the depth of the bag.
Highly recommended if you want quick access to your phone or navigation without digging through the main compartment.
Attachment Options
How the bag attaches to your frame matters more than you'd think.
Daisy Chain (Standard Option)
A strip of webbing runs around the perimeter of the bag with attachment points every 40mm. You use Velcro straps to secure it to the frame wherever you need.
Why it's good:
- Super adjustable — you can position straps exactly where your frame needs them
- Works with almost any frame shape
- Easy to remove and reattach
This is what I recommend for most people.

Lace-Up
Cord threads through loops sewn into the bag and around the frame. Gives a great look and hugs the bag to the frame well, but a bit fiddly to install.
Bolt-On
The bag bolts directly to bottle bosses on your frame. Super secure, but only works if you have bosses in the right spots.

Fixed Velcro
Permanent straps in set positions. Simple, but less adjustable than daisy chain.
You can also mix and match — bolt-on at the bottom, daisy chain at the top, for example.
H2O/Cable Port (Optional Extra)
This is a overlap in the spine of the bag that lets you pass hydration tubes or cables from inside to outside.
Use it for:
- Running a hydration bladder inside the bag and passing the hose out
- Routing charging or lighting cables
Not essential, but useful if you're planning to carry water or charge batteries in the bag from a dynamo.
Fabrics and Colours
All the fabrics I use are tough enough for the job, so it comes down to what you think looks good.
Classic Cordura: Durable, proven, the workhorse fabric.
Ecopak and X-Pac Laminates: Lightweight, waterproof, modern. Slightly lighter than Cordura.
Ultra: Premium laminate, very light, very strong. Popular with the ultralight crowd.
Mix and match: Want Cordura on one side and EPX200 on the other? Go for it. It's your bag.
Check out the current colour chart here

What Happens Next?
Once I've got your template and your order, here's how it goes:
1. I'll check the template fits and confirm your options
2. I'll make the bag (current lead time can be found in the banner at the top of the website)
3. I'll ship it to you, or you can pick the bag up from my workshop
If you've got any questions along the way, just email me at mike@stealthbikebags.com or call +64 27 464 1591.
Ready-Made Options
Not keen on the wait for a custom bag? I've also got a few stock frame bags ready to ship:
- F35 Wedge Frame Bag — Universal fit, works with most frames (35° angle)
- F30M Frame Bag — Designed for mountain bikes (30° angle)
- F50S Frame Bag — Road and gravel bikes (50° angle)
These are made in batches and ready to go — no template needed, no waiting.
Get Started
If you want a frame bag that fits your bike perfectly, browse the custom frame bag options here or get in touch and I'll help you figure out what'll work best.
Current lead time for custom bags is around 3-4 weeks. All bags are made in Wellington, New Zealand.